As there are many questions about how to first get started with the SundaeSwap Testnet I put together this little page to guide you through the basic steps. So let’s dive right in. Please check this post if you are looking for a SundaeSwap ISO FAQ.
Note: The UI is subject to a constant improvement process, so what you see on the testnet may differ from what is shown here.
1. Navigate to testnet.sundaeswap.finance and click on “Beta Guide” if the window does not pop up automatically.

2. Click “Download Nami Browser Extension”

3. You will be redirected to the Nami Wallet Homepage. Choose one of the supported browsers and install the extension.

4. Setup a dedicated testnet Wallet as shown in the following pictures:
“New Wallet” -> Accept the terms and click “Continue” -> Write down your seed phrase and confirm the checkbox -> Verify your seed phrase and press “Next” -> Type in a Wallet name and your spending password


5. After creating the wallet, click on the robot icon in top right corner of Nami, click on “Settings” -> “Network” and change the network to Testnet.


6. Accept the terms and click on “Connect Wallet” and follow the instructions.


7. Click on “Beta Guide” again, and proceed with Step 3 to fund your wallet with some test tokens:
“Fund Your Wallet” -> Accept terms and click “Fund Wallet”


8. Wait until you receive your testnet funds which may take a while. If you do not receive any funds you can also use the Cardano Testnet Faucet to request 1k tADA per 24 hours.
9. Set your Collateral as shown in the pictures (check https://namiwallet.io/ to learn what Collateral is):
Open Nami -> Click “Collateral” -> Type in spending password -> “Confirm”


10. The basic Setup is done now. Let’s do our first Swap by switching over to the “Swap” menu. Choose the tokens and amount you want to exchange and click “Swap”. Afterwards you’ll be presented with a summary about the Swap you are going to make. After verifying that everything looks correct Click and Hold the “Hold to Swap” Button until it says release. Nami Wallet will pop up and ask you to sign the transaction. Do this by typing in your spending password and clicking “Sign”.


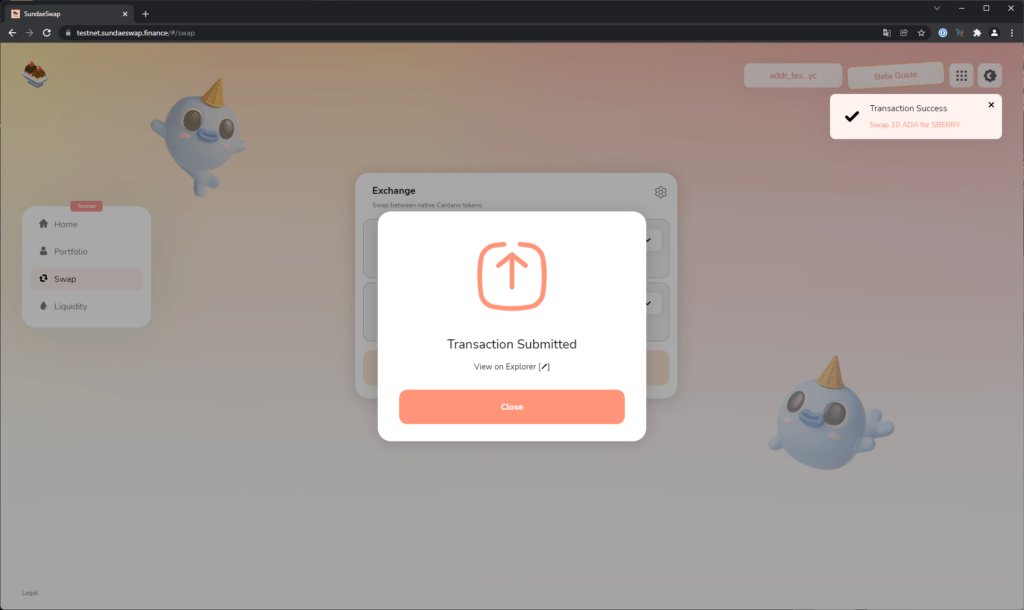
11. Now that your transaction is successfully submitted. You need to wait for it to get actually scooped and executed.
12. You can check the state under the “Transactions” Menu which can be accessed through the addr button right on the left of the “Beta Guide” Button.

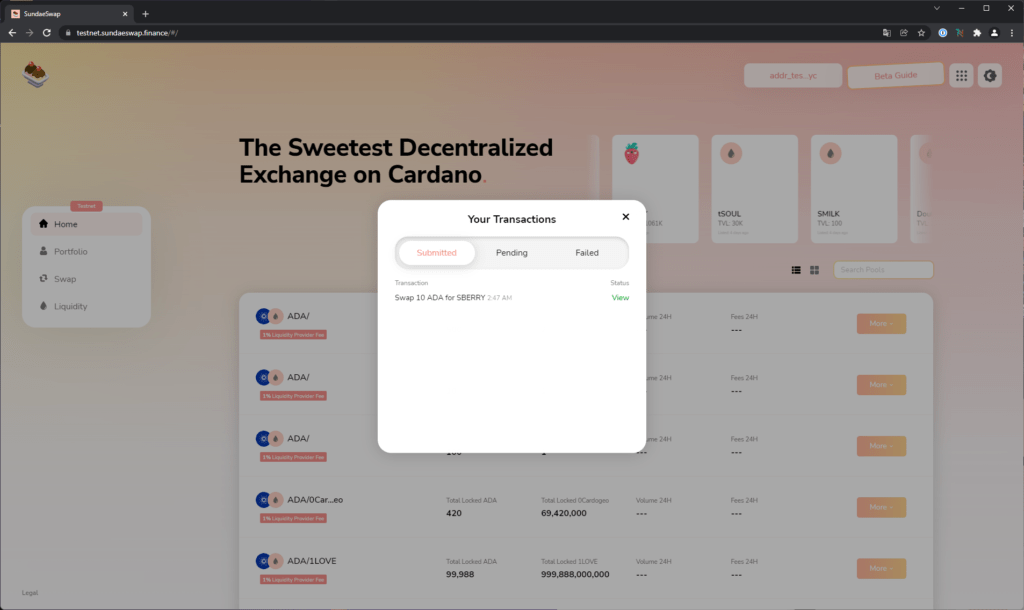
13. Only after your transaction shows in the “Submitted” tab it was actually executed. If your transaction is still pending you can cancel them via the “Cancel” Button.
Please note:
- There are still several Bugs in the UI; Transactions may disappear or show up in unexpected sections
- When orders can’t get executed using the set slippage they will stay as “limit orders” on the chain which may never get executed. To reduce this amount you can set your swaps to a high slippage like 99% / 100% for the duration of the testnet

- Sometimes things may be slow
- Sometimes things might not work
- The shown fees are testnet fees they will differ from mainnet